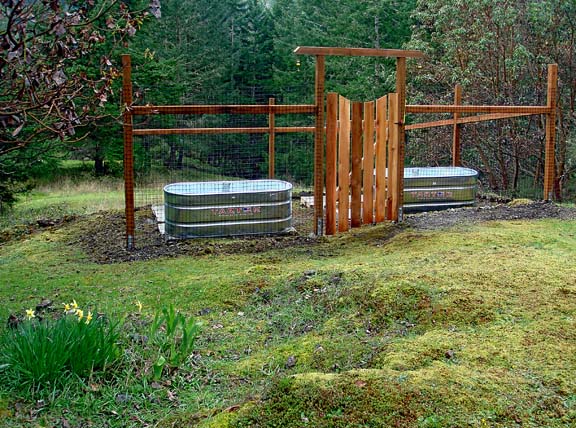
Our land is bed rock and not level. So to make a garden, we needed to terrace a sloping, south-facing hillside, making level areas for the beds. Also, since we're both seniors now, the need to save wear and tear on our backs sent us looking for a system of raised beds. Finally, we wanted a system that would conserve water because we rely on rain for our only water supply and face a 3-month dry spell every summer..
A good friend with decades of gardening and countless hours of garden magazine-reading under her belt, told us about an article she had read in
Mary Jane's Farm about horse trough gardening. We found a pdf file on the internet showing amazing pictures from the experimental garden using this system (
here). We decided to try it!
This raised-bed system features a 4" reservoir of water in the bottom of each trough, a feeder tube for adding water and an over-flow indicator hole in the trough. Although one must top-water a little at first, the plants soon begin to take their water from the reservoir. Less water is required than top-watering or drip-hose systems. Methods of planting, rotating crops and spacing follow the principles of "intensive gardening." More on that subject in later posts.
We ordered the troughs from our local building supply place. They come "nested," one inside the other, making one of them slightly smaller than the specified 2' x 6' x 2' deep.
The next step was to get PVC pipe for the water reservoir system at the bottom of the troughs. For each trough, we cut about 22 pieces of 4" perforated PVC pipe, 4" high. To make "soil legs" we cut 5 pieces of 4" non-perforated PVC pipe, 6" high and then drilled about 30 quarter-inch holes in each piece. We spaced these out evenly on the bottom of the trough.
Following the specifications from Mary Jane's Farm, we found a source (
McMasters-Carr) for polypropylene screen, 3/16th inch thick with staggered 5/16th inch holes, to place over the PVC tubes to separate the water reservoir from the dirt above, and still allow the water to wick up into the soil. We made cardboard "patterns" from the shipping carton and then used a jigsaw to cut the screens to fit the troughs. We also cut five 4-inch holes in the screen for the "soil legs" and a 2-inch hole at one end for the filler pipe. Finally, we drilled a 1/2-inch hole at one end of each trough. We'll know when to stop adding water to the reservoir when it begins to drain out of this hole.
The assembled trough-innards look like this. The screen fits over the "soil legs" (which get filled to the bottom with dirt and help the water to wick upward) and rests on top of the 4" sections of PVC. The filler tube is inserted through the 2" hole in the screen. Now it's ready for the dirt. I'll write more about that in the next post.
By the way, we decided to fill only 2 troughs this year, our first attempt at gardening. But we created pads for a total of 8 troughs and plan to add more next year if it's working for us.